Tuesday, November 19, 2013

Another big year!

The inside of the cottage really took shape this year! I am extremely happy that we can now "stay" in the cottage anytime - since we have working heating/cooling, plumbing, toilet, sink and shower, HDTV and a few beds. The absolute best is having a live working thermostat (furnace and a/c) to control heating and cooling. This may sound funny, but with the crazy weather swings from 20 deg and frigid to 95 deg and humid, this is so important for the cottage in the middle of an island in the middle of the lake.

Big thanks to everyone who helped throughout the year...
  • The drywall crew - Albert, Al, Gary, Ken, Andy, Scott and Brad
  • KI Neighbors - Chris, Tim and George
Special shout-out to my uncle, Al Stenger! The heating/cooling installation would not have been possible without all of your help, hard work and advice (including multiple trips to Menyhart in Cleveland).

Here is the final exterior photo of the season. I was hoping to get the lot grading finished, driveway gravel added, and grass seed planted. However, the focus this year was on getting interior items up and running. Therefore, this photo does not look much different from last year.

 "Our House" - November 2013

Check-out the interior progress made in between November 2012 and November 2013. Biggest improvement is the installation of the drywall and wood ceiling.

November 2012

November 2013
 
Here is a nice shot of the sunset from Portside Marina early Saturday evening. Notice the empty dock.

Sunset from Portside Marina

Sunday morning, I finished cleaning up and winterizing all of the plumbing. I used the air compressor to blast pressurized air into the lines right below the pex manifold. This is a two-step process, first concentrating the air downward to blow out any water left in the well pump and then second blasting air upward to blow out any water in the pex manifold, hot water heater, and ultimately all of of supply lines. I then poured anti-freeze into all of the traps and plugged in the heat tape for the sump pump and water main line to prevent freezing over the winter season.

Well, this is the last post for 2013. Looking forward to next year.
Neil

Monday, November 18, 2013

Last working weekend of the season

Well, all good things must come to an end and island season is no exception. I made the final trip up for the year last weekend. The plan was to work on any low intensity projects and then winterize for the year.

Friday night, I framed out the attic access that was just too big of an opening for what is actually needed like the space around the future access door for trimwork and clearance for the nearest ceiling fan to be installed.

Opening re-framed

Drywalled

Mudded

On Saturday, the Arnold brothers arrived late in the day to work on Chris's cottage. We met up later on the Arnold's new lot to make a huge fire and drink some beers. After going downtown for dinner at the Pump, we came back to re-stoke the fire.

Big Tim
 
Sunday, I started early with organizing and winterizing. I had to make the 12:30 pm ferry to get back in town. I spent most of the morning cleaning up and organizing my tools before starting on bleeding the water lines.


Monday, November 4, 2013

Great room - ceiling done!

Made it up to the island just for Friday night with the plan to leave mid-day Saturday. The goal was to finish the ceiling and work on a few other odds and ends. Chris and Tim were cool enough to join me and were critical to wrap-up the ceiling work. On the way, we had to stop at Menards to buy more ceiling boards and miscellaneous trim pieces since we did not know exactly what we needed until we got back at it.

Around 9:00 pm on Friday night, the ceiling was looking good and nearing completion. We did not have time to pre-stain the final wood planks so we hung them unfinished and then I stained them later in place.

Chris measuring up the trim approach

Representing the "last spike", very similar to the completion if the Transcontinental Railroad in 1869, here is a photo of me putting in the "last nail" of the ceiling project.

Putting in the LAST nail

Here is a fresh photo from Saturday morning after staining the final boards. This great-room ceiling is really the first finished surface in the entire cottage so far. I am super happy with the results.

Looking good

At the peak of the ceiling where the two adjoining surfaces meet, there is no easy way to trim this out due to the weird angles and trying to avoid making long thin rips of the ceiling boards. We decided to use 1 x 6 pine, cut them to length, and nail between the fan boxes already in place. The fan boxes were great because they had a nice flat square surface to match up.

 The final final!

Saturday morning, I managed to slap up the last few pieces of drywall in Anna's room that close off the plumbing exposed behind the main bath shower. You'll notice I had to "piece together" several scraps of drywall. I realize the drywall pictures are not very exciting, but this was the last open wall and I was able to use up and put away all the remaining sheets of drywall and scraps.

Anna's room - drywall done

This season is rapidly coming to a close. Next trip up will be the last for the year. I plan to winterize and close up the cottage for the season.

Stay tuned.

Friday, October 25, 2013

Water test passed - Erie county certified!

Great news!

Monday morning, the Erie County inspector came to take a water sample and inspect the total water system installation.

All good - passed!


By Tuesday (10/22/13) late afternoon, I received a call stating that the test results came back and we are good-to-go. By Thursday, we got the hard-copy in the mail. One more thing completed and checked off the "to-do" list...

Tuesday, October 22, 2013

Ceiling wood install started

The plan this weekend was to work on grading the lot and possibly plant some grass seed. However, the weather did not cooperate (too rainy and muddy) so we decided to defer the remaining site work until next year. This sucks.

Plan B

Since I had already prepared the ceiling wood a few weeks ago, we could proceed with this installation any time in any weather. Chris and Tim Arnold were the critical team members with the experience needed to get this rooling on Saturday afternoon.

Here are some photos of the progress over the weekend and into Monday afternoon.

Chris - the man with the plan
 
Big Tim - working the saw
 
 "Kudos" to Chris for making some serious custom cut-outs

By mid-day Monday, we are probably 85% done. Unfortunately, I need to buy a few more 12 foot boards since there are only a few left over and certainly not enough to finish the job.

Looking towards the back of the cottage 
 
Looking towards the front of the cottage
 
Huge thanks to Chris and Tim Arnold for making the ceiling happen. When you see this live, it really looks great.
 
Without fail, I still managed to mud more drywall for probably 4-6 hours. This really seems like a never ending process. I think I am now on the 7th, 5-gallon bucket of joint compound with probably 3 or 4 more to go.
 
Next steps, head back up in a few weeks and finish the ceiling! 


Wednesday, October 9, 2013

Ceiling wood prepared

Not the most exciting weekend on the island. Actually, kinda boring. The weather was nice heading up on Friday but slow rained the rest of the time. I seriously did not leave the cottage all weekend and missed any downtown activities that may have been underway.

Progress made...
  • Water tank bleached
  • Ceiling boards stained
  • Co-axial cable 5-way splitter installed
  • Some drywall mudding
  • Quality time spent with island dog "Maddie"
Big thanks to neighbor George for bleaching my water tank, pumping out and then filling with fresh water - Wednesday, Thursday, and Friday. This is a big accomplishment and one more step towards getting the final inspection completed by the county.

I did manage to stain 70 - 12 foot ceiling boards with clear poly urethane. This is just tedious, slow work. Then you need to accommodate for drying space and drying time. So, the whole process took about 10 hours of work over two 1/2 days. I built a drying rack last weekend that I used to stack 1/2 of the boards at a time. Here are some photos from Friday night with ~35 boards stained.

Ceiling boards drying after applying clear poly urethane 

I also worked on wiring up the co-axial cable splitter in the attic and connected it to the HD antenna. Still need to put co-axial connectors in most of the rooms, but I ran out of RG6 connectors.

Saturday afternoon, I started mudding a second coat to Neil's room and closet to cover the corner tape and screw holes. FYI - there is still a mountain of drywall mud work that needs to be done. I am somewhat burned-out on drywall mud for now. My new plan is to hit it hard in the Spring and make a push to get it done.

Probably the highlight of the weekend was that "Maddie" the island dog, came with me for the quick rainy weekend. She kept me proper company all weekend.

Next steps...

Planning to go back the weekend of Oct 18-20th to do the final grading of the property with Chris's borrowed tractor. This should be fun.

Monday, September 30, 2013

Water tank wood fixed

Anna joined me for a quick journey up to the island on Friday with plans to come home Saturday night. I had one goal in mind, fix the "screwed-up" water tank wood over a short Kelleys work weekend.

The photo below is from earlier this Spring, before I back filled with gravel and put on the top cap.

Water tank wood wrap
 
Following this photo, I filled the cavity with gravel (by hand) and capped the top with nice mitered corners.
 
So this looks good, right?... wrong!
 
After six months of gravel settling, the wood sides separated from the tank. Structurally, this is fine, but it looks awful and would continue to get worse over time. This was driving me friggin' crazy.
 
The root of the problem was that I didn't secure the 4x4 posts properly (at the top) because I wanted the top surface of the water tank "clean" and everyone talked me out of fastening directly to the concrete sides for fear of damaging the tank itself.
 
Well, what can I say, I have made mistakes in the construction process and this is no exception. Here are some photos of the problem, this sucks...

"Before" photos
 
Saturday morning I started hacking at this steaming pile of crap. First, I had to remove the decking from the side to release the gravel. You can imagine tons of gravel pouring out on the ground. Then I had to figure out how to pull-in the sides using a combination of strategically placed temporary bracing, miscellaneous bolts, and high tension ratcheting straps. I spent way too much time messing around to pull the sides in. I was able to get them to move several inches but didn't get them 100% shored-up as desired.
 
Anyway, approximately 8-10 hours later, I horizontally strapped the posts with 2x4s, replaced the verical decking on the sides, re-capped the top with beefy 2x8, and moved all of the gravel (by shoveling many, many, many, 5 gallon buckets full) back into place. Here is the finished product...

 
  "After" photos

I have to say I am happy with the outcome. I was able to fix the problem to about 90% of the original desired result. It's not perfect, but I can live with it for now.

Big thanks to my little helper Anna, who kept me company and helped out a ton (literally) with smoothing out the gravel that had to be replaced at the end of the process.

Finished product - with cameo appearance from Anna

Anna and me packed it up and headed home on the 8:30 pm ferry Saturday night.

Next steps, going back up next Friday to do the water tank purification required by the county. The process involves pouring several gallons of bleach directly into the water tank, running the bleach water through the fixtures, letting it set for at least 8 hrs and then flushing out the tank completely.

Tuesday, September 17, 2013

A lot of work and a little fun

Productive solo work weekend with the following accomplished:
  • 70 - 12 foot long tongue-n-groove boards delivered to cottage
  • ALL remaining drywall corners (ceiling and wall) mudded
  • TV antenna mounted and many channels scanned successfully
  • Some more PEX plumbing connected to main bath shower
As the cottage saga continues, the money continues to fly out of my wallet in a feverish manner. For example, we have decided to use tongue-n-groove 3/4 inch pine "car-siding" on the vaulted ceiling. This will look totally sweet when finished, giving a huge cottage dramatic effect when you enter. I planned to defer the purchase of this wood for quite some time, maybe even until next year. However, this material went on sale for 50% off at Menards for a limited time. So... I had to buy it quick. Anyway, he is a photo after I hand selected about 1/2 of the 70 boards needed.

12' x 8" x 3/4" tongue-n-groove pine "car-siding"

Keep in mind, these boards are 12 footers! Here is my truck all loaded up. I fear for the other cars that had to drive behind me on Rt. 2 for the slow journey to the ferry dock from Menards. I was trying to beat the weather because it looked like rain from the clouds. The plan was to get this loaded onto the ferry and unloaded to the cottage ASAP.

70 - 12 foot boards loaded up stupid style!
 
After unloading and staking the ceiling boards, I knew I had hours of corner mudding ahead of me for the remainder of the weekend. I spend Friday night, and all of Saturday tapping and mudding the remaining rooms, bathrooms, and closets.
 
Master bedroom - all corners mudded

The mudding continued into both bathrooms working around the showers, etc. Notice the sun tunnel shining bright in the bathroom photo below.

Master bathroom - all corners mudded
 
I also finished the remaining two skylights. These are particularly tricky because you have to get up on the tall ladder and the space between is only 14 inches.

Skylight - all corners mudded
 
Thanks to Chris, he mounted the TV Antenna in the attic and rescanned the channels. Now we get a ton of new channels all in high-def.
 
On Saturday evening, I made it over to Herb's 60th birthday party and pig roast to visit the neighbors "in-the-hood". Good times, as always.
 
Next steps...
 
Probably won't be heading up for a few weeks.

Tuesday, September 10, 2013

200 years ago today, September 10th, 1813 - the Battle of Lake Erie

September 10th, 1813

Today is the offical bicentennial of the Battle of Lake Erie.


Link to a summary of the battle by the History Channel - The Battle of Lake Erie, 200 Years Ago.

Here is a quote from Ohio Governor, John Kasich as part of a Executive Resolution to recognize the Battle of Lake Erie...

"...our freedom, independence, and even our very way of life can be directly tied to the Battle of Lake Erie. Had the outcome of the Battle been different, our country's westward expansion may have been halted and control of the Great Lakes lost, changing America forever."

Think about this and take some time to honor Oliver Hazard Perry and his crewmen today and always.

Thursday, September 5, 2013

"Don't Give Up The Ship"

Labor Day weekend with a bang! We had a jam-packed, family-filled, fun-fest of a Labor Day Bicentennial for the Battle-of-Lake-Erie!

This was a milestone event for our family, because it was the first time we were able to stay at the new cottage all together. Although the cottage is still in a very rough construction state, having a working shower, toilet, 2 beds, and air conditioning, made it all possible.

Bonnie, Anna, Sophie and me headed up for the long weekend on Thursday early evening after work. (Neil II stayed home with Bob and Judy, big thanks.)

Me an my baby kickin' off the weekend at the Casino

This was the celebration of the tall ships with every Lake Erie island hosting at least one ship. Kelleys was the host port for both the Appledore IV and the Explorer.

Appledore IV - leaving Kelleys dock early Friday morning

Friday, the organized weekend festivities officially started. We found the best stuff at the 4-H Club where they had an inflatable bungee activity thing set-up, where you wear a harness attached to a bungee cord. The idea is to run as fast and hard as you can, marking your distance with a Velcro bean bag, before the bungee cord contracts and pulls you backwards. 

Anna and Sophie gearing up for the bungee run

Anna and Sophie - live in action!
  
My mom, Uncle Al and Lori joined us early on Saturday for some quality family time. The 4-H Club had tethered hot air balloon rides. I was able to help out and volunteer as part of the ballon landing crew for over an hour before we got our chance to ride. This was a really cool experience for all.
 
Tethered hot-air ballon ride
 

Mom, Uncle Al, and Aunt Lori

Me, Bon, Anna and Sophie
 
Sunday, back at the 4-H Club, the Cannon brigade was firing off every hour in tribute to the Battle of Lake Erie. You could feel the ground shake and then the sound would echo off of the nearby tree line.

Cannon crew firing a shot

Historical tidbit for you...
 
The Battle of Lake Erie, was fought on 10 September 1813, near Put-In-Bay. Oliver Hazard Perry of the U.S. Navy and his crew defeated the British Royal Navy and ensured American control of the lake for the rest of the war and ever since.
 
Monday, was the official re-enactment of the Battle of Lake Erie from the original location in the water 200 years ago. My Cousin John coordinated a boat ride for the whole family outing from Kelleys, past Put-In-Bay, to the battle site and back.
 
Sørlandet - Tall ship heading to the battle line
 
This was a serious under taking. I have never seen so many pleasure boaters on the lake at one time. I heard there were ~1000 or more. We spent most of the day out on the water and got as close as possible to the re-enactment where you could see and hear cannon fire from the ships.
 
Docked back at Kelley's...

Family photo from Cousin John's boat - White Caps
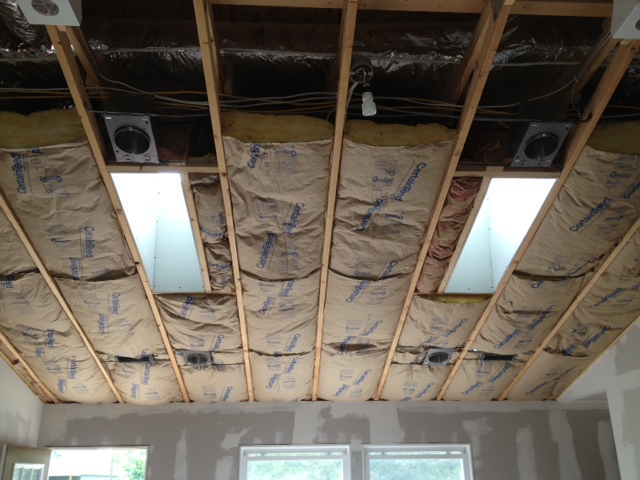
Cottage progress...

Bonnie forbid me from working on the cottage this weekend and it was killing me! Whenever, we would spend any idle time in the cottage, I could not help myself from staring at the mountain of unfinished work.

Thankfully, Big Tim was also on the island and he was able to knock-off some items on the "Tim List" Here is a photo of the main shower partially plumbed in, courtesy of Big Tim's handy work.

Main bath shower

Sadly enough, I will not be headed to the island next weekend. Planning to go the weekend of Sep 13th-15th to continue drywall mud and hopefully deliver the wood planking for the vaulted ceiling.


Monday, August 26, 2013

Progress continues...

Quick weekend, since we didn't make it up to the island until late Saturday morning. Scott, Brad and Chris came up for the day and spent Saturday night. Big thanks to Scott for finishing the leveling of the septic field and helping with some drywall mudding. Chris helped out with some insulation and I finished drywalling the inside of the 2 remaining skylight bays.

The best news (other than never having to touch any more "ichy-ass" insulation) is that the HVAC efficiency will be greatly improved now that the vaulted ceiling is wrapped-up tight with 12 inches of R-30 insulation. The A/C now blows nice and cold and can cool down the cottage very quickly.

Here are a few photos of the finished product. Unfortunately, these photos don't really "do justice" to the amount of work and hassle involved.

Facing front - vaulted ceiling insulation and skylight bays drywalled
 
 Facing back - vaulted ceiling insulation and skylight bays drywalled

Next step is to tape more corners and continue mudding. Yes, this will continue for the next few months. I am loosely planning on hanging the tongue-n-groove pine siding on the vaulted ceiling sometime maybe in October. Just found out today that this wood is on sale for 50% off for the next 10 days.

Looking forward to a long Labor Day Weekend with the family. This is the 200 anniversary of the Battle of Lake Erie and the island will be packed with festivities. More to come!

Tuesday, August 20, 2013

Skylights, more insulation and mud

I was able to squeeze in about 25 hours of solo work on the cottage this weekend. Brad came up for Friday night. We went downtown for a few hours for some gin & tonics. I spent the rest of the time working away and I missed all the Homecoming stuff going on all weekend.

Major accomplishments include:
  • Finished insulation wrapping of the cold air return
  • Drywalled around two of the skylights
  • 33% of the vaulted ceiling insulation
  • Drywalled mudded ~20 corners and ceilings
  • Roughed in a recessed shelf hole in the master bathroom
I had to wrestle with multiple angles and a tight working area to figure out how to drywall the inner cavity of the skylights. Here is a photo of the finished result. Now I just need to repeat this three more times.
Skylight #1 drywalled boxed and insulated

After I figured out how to cut the angles, I jammed-out one more skylight. This photo below  represents 50% completion on the skylights and 33% on the vaulted ceiling insulation.

Front skylights #1 and #2 drywall boxed and insulated
 
Of all the work needed for the cottage project, the top two worst jobs are #1 using a shovel (dirt, gravel, whatever) and #2 working in the attic space (hot, and no room to get at what you need to work on). So, sometime early Saturday evening, I finished (yes finished) the insulation wrapping of the cold air return. No words or pictures will really represent what a pain-in-the-ass this job turned out to be. I can't wait to finish the vaulted ceiling insulation and never have to look at this again. Anyway, here is a photo...
 
Cold air return insulation wrapped, nice and tight

Drywall mud continues...
I spent several hours hacking-away at the endless mountain of drywall mudding that is needed. I probably finished about 20 corners, two closets and most of Anna's room.

Next weekend will be the last work push until taking a break for a long Labor Day Weekend with the family...